Adding back-in-stock to EasyStore collection page
In order to add back-in-stock to EasyStore collection page, you need to use custom triggers and modify theme code. Below we will guide you through the setup.
Install Back In Stock
First, ensure that you've already install back-in-stock to your EasyStore site.
Adding Snippet
Locate collection product file from EasyStore admin:
product-grid-item.liquid
Search for this code: {% app_snippet 'collection/product_bottom' %}
Paste the following snippet after that line.
<!-- BackInStock Custom Trigger -->
{% if product.available != 1 and product.available != true %}
<div class="ov-bis-notify" style="margin-top: 5px; margin-bottom: 15px;">
  <a href="#"
     class="ov-bis-trigger"
     data-easystore-product="{{ product | json | escape }}"
     style="font-size: 13px; color: #6d7390;"
  >
   Notify me when available
  </a>
</div>
{% endif %}
<!-- BackInStock Custom Trigger -->
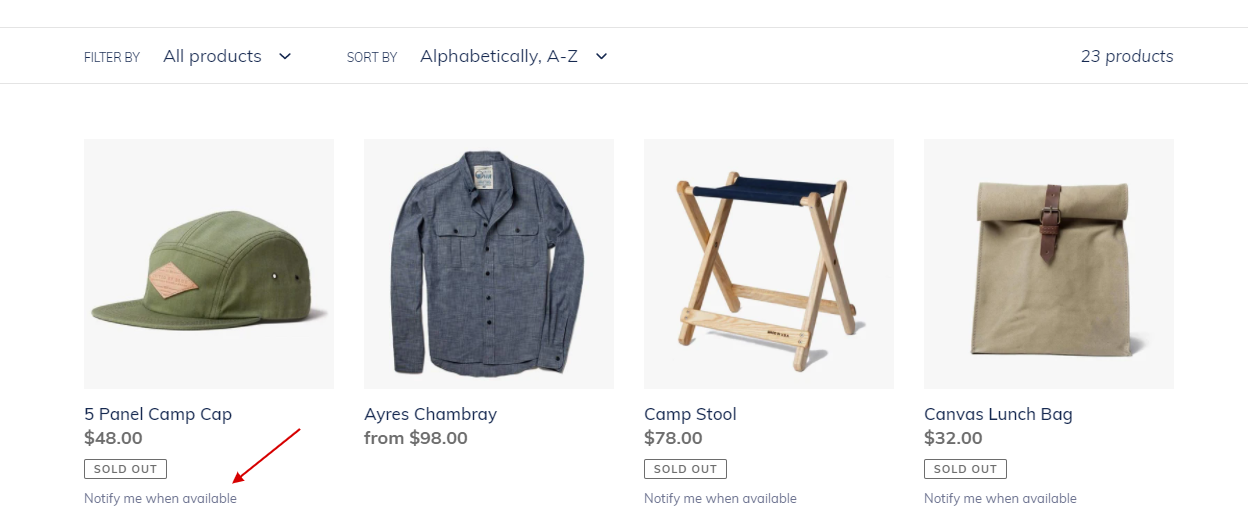
What this snippet does is that it will display a back-in-stock trigger link if product is not available. Keep point to note is that we're using data attribute to pass EasyStore product data: data-easystore-product="{{ product | json | escape }}"
Need help installing?
If you need additional help to install, you can contact us.